
Generating an Agenda
To generate an agenda, open the Agendas module in Legistar.
Legistar displays the most recent past and upcoming scheduled meetings.

Type the name of the committee into the *Agenda for the field and click Search. Legistar displays most recent past and scheduled upcoming meetings for the committee.
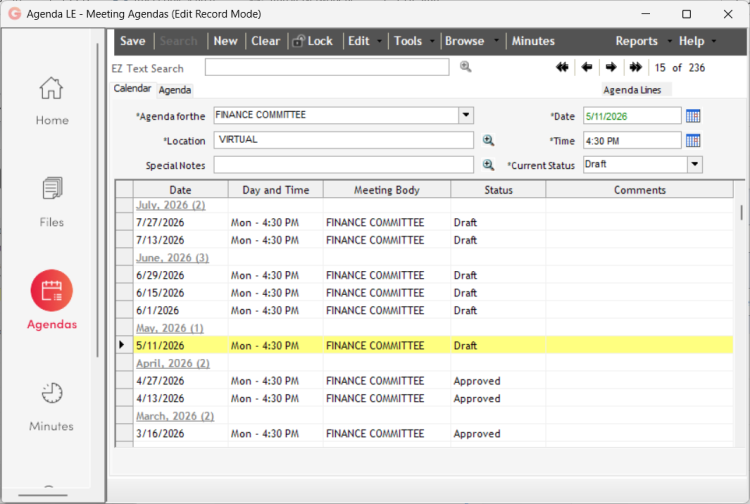
Click on a meeting to select it from the list and then click the Agenda tab (top left within the control window).
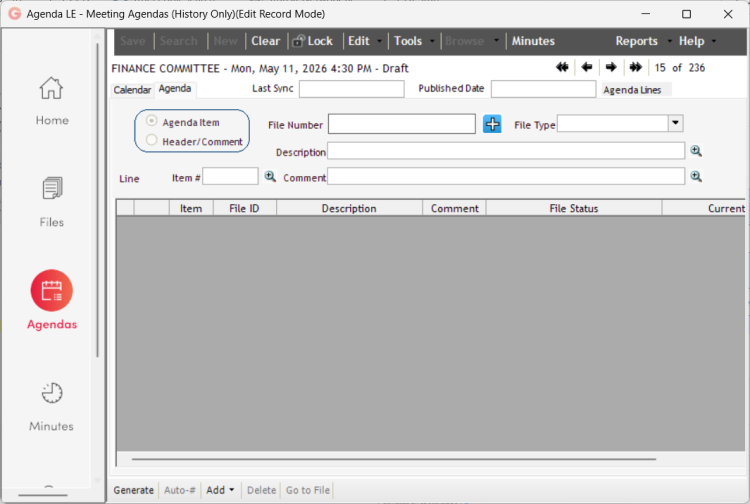
Click on Generate (bottom left part of the window). Legistar autogenerates an agenda, based on the introductory and body agenda lines and headers which were configured for the committee, as well as most or all of the files referred to the Committee.*
*NOTE: Legistar regularly misses files that have been referred to committees. Because of this, it is important to track files outside of Legistar to ensure that the agenda includes everything that should be considered by your committee. Refer to Track Files Referred to your Committee.

Modify the agenda
Once you have generated an agenda, you will likely need to do one, several, or all of the following before the agenda is complete and accurate.
- Edit lines
- Delete lines
- Add lines
- Move lines
NOTE: Whenever deleting, adding, or moving lines, be sure to click the Auto-# button at the bottom of the window when you are finished to renumber the items in numerical order.
Edit lines
The bold lines (1 - 6) in the figures above and below are the introductory lines that have been preconfigured for the committee. Introductory lines often have specific text which must be edited for each agenda.

To edit a line, click on it to select it. Once the line is highlighted as shown above, click on the magnifying glass to access the text editor. Note that you can do this for both the Description and Comment fields (committee agendas may be set up with text in the Description field or both fields).

Edit the necessary text and click Save.
Delete lines
The auto-generated agenda will likely contain one or more lines that you will need to delete.
To delete a line, click the line to select it.

Right click on the line and select Delete, or click the Delete button at the bottom of the window. Click Save (top left dark gray bar in the control window).
Delete multiple lines
You may also delete multiple lines in Legistar using standard Windows key sequences:
- Click the ctrl button to select individual lines, or click the shift button to select a set of sequential lines.
- Right click and select Delete, or click the Delete button at the bottom of the window.
- Click Save (top left dark gray bar in the control window).
Add lines
You will likely need to add one or more lines to the agenda.
To add a line, select the file nearest to where you want to insert a line.
Right click on the line and select Add After Selected Line, Add Before Selected Line, or click the Add button at the bottom of the window and make a selection.
Legistar adds a blank line to the agenda.

The line type defaults to Agenda Item as shown in the top of the window.
- For agenda items, add the File Number and click into the blank field. Legistar will add the file that has been entered.
- To add a Header line or comment, click Header/Comment to change the selection. For a header line, add the title to the Description field and select File Type from the drop down list to set the heading type. When adding a comment, enter the text into the Comment field. When finished entering, click into the blank field and Legistar will populate the text that has been entered.
Click Save (top left dark gray bar in the control window).
Move lines
To move a line within the agenda, click the file to select it.

Click on the arrow (left side of the control window) and manually drag the file up or down.
In some instances, it may be easier to delete and then re-add the file in the correct location.
Be sure to renumber after moving a file by clicking Auto-#.